Deprecated: Function jetpack_form_register_pattern is deprecated since version jetpack-13.4! Use Automattic\Jetpack\Forms\ContactForm\Util::register_pattern instead. in /home1/willswar/public_html/wp-includes/functions.php on line 6078
camera gear – Bill Swartwout Photography

The Making of a Classic Bridge Photograph

Charles W. Cullen Bridge over the Indian River Inlet at Sunset

Once in a while I get asked, “How long did it take for you get that picture?” My usual answer is, “less than a second, but…there’s more.” Yes, “but” – because there is a lot more involved than snapping that shutter at 1/125th of a second or thereabouts.

Indian River Inlet Bridge at Sunset Printed on Canvas
Sunset under the Indian River Inlet Bridge printed on artist-quality canvas.

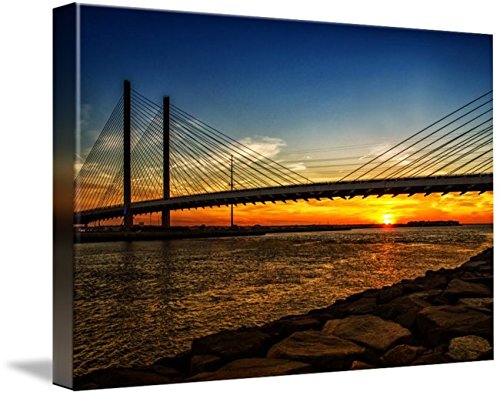
Imagine planning to create a pleasing sunset photograph of a popular and photogenic bridge – such as the Charles W. Cullen Bridge over the Indian River Inlet at the Delaware Seashore State Park. Here’s a sequence to think about: 1) Packing the camera gear, 2) don’t forget the tripod), 3) driving to the location, 4) setting up the gear and tripod, 5) calling on years of experience to frame the shot from the right angle (or several angles because one is not enough), 6) repacking the gear and trekking back home, and finally 7) editing the image captured from the outing to create just the “right” couple of images for display and to offer for sale. The 1/125th of a second to get “that” picture was actually several hours of time on “that” day and, really, might have been several years in the making. Also, figure in the complexities of the weather – to have the clouds and the sun cooperate in just the right way.

Camera Screen with a Scene of the Indian River Bridge at Sunset
Trusty ol’ Nikon on a tripod on the north jetty at the Indian River Inlet.

Not only did I have prep and driving and time on site, I also had a slight bit of danger involved. (Cue the ominous music here.) I had to walk out on the rock jetty with no handholds and water-sprayed rocks (slippery?) while carrying my camera bag, a tripod – and me. But the result was well worth it. Shots from this particular photo shoot have proven to be quite popular photograph over the years, having been purchased by several art buyers to decorate their homes and offices. Another photograph from this location has appeared in a popular Indian River Bridge Calendar.

Indian River Bridge at Sunset Wall Art in Room Setting

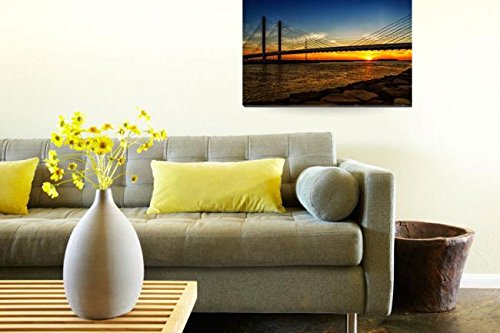
Where would you hang this in your home?

Click the links below to see the actual image in a larger size and to browse or shop the different substrates for wall art and/or a variety of home décor items.

Link: Indian River Inlet, Bay and Bridge Wall Art

Link to: Bill’s Gallery at Fine art America

But, please don’t get me wrong. I am in no way complaining. I love doing my photography – as I have for the last half century. It gets me outdoors and it provides exercise. It is mentally stimulating and fulfilling – to know that, in my own way, I am contributing some art to the world.
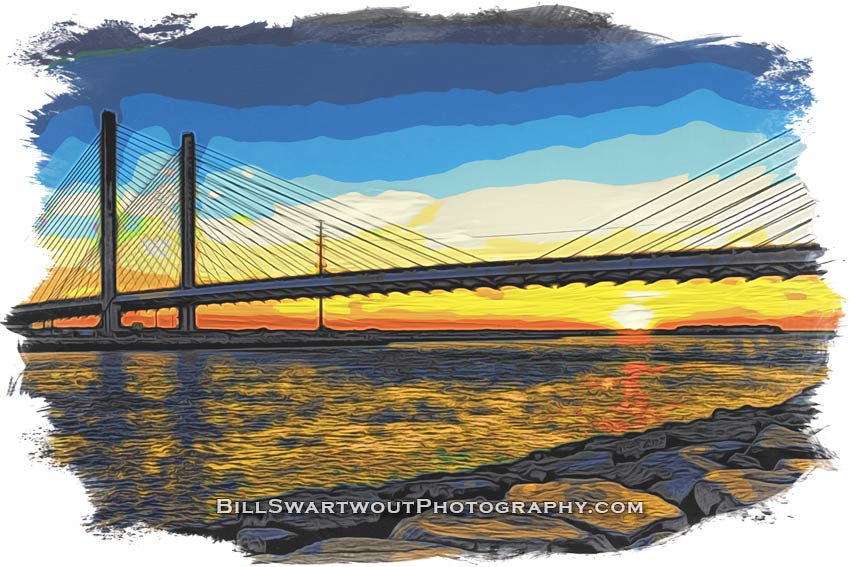
There can be more…

Oh, yes, once the image has been rendered as it was envisioned then some creative editing may be applied. Here is a simulated watercolor version of the above photograph. This version is popular for t-shirts and other apparel items.

sunset under the Indian River Bridge Watercolor
Simulated watercolor of the sun setting under the Indian River Inlet Bridge at the Delaware Seashore State Park.

Nikon DSLR vs. Olympus Mirrorless Micro 4/3

Which camera to keep and build into a better system?

I am in need of a quality macro lens but was unsure what to purchase – to add to which camera bag. Today I decided to evaluate my arsenal and did an A/B comparison between my Nikon DSLR and my Olympus Mirrorless Micro four-thirds cameras. I tried two different “kit” zoom lenses on each – varied the focal length (18-300mm) and ISO (200 and 3200). Below is one comparison – guess which one came out ahead – in all instances…

Both cameras were mounted on tripods on our front porch and targeted a neighbor’s front window for a variety of surfaces. Some of the more “distant” shots (wider angle) included sky and lawn for additional comparison textures. But the stone and window frame were good for comparison in the sample below and are indicative of all the shots.

Click the image for a larger version…

Both camera are 5+ years old and have been true workhorses for me. We cruise often and these have been in several foreign countries as well as all up and down the East Coast of the USA. Both still work perfectly.

The cameras are 1) Nikon D3200 compared with 2) Olympus OM-D E-M10 (original model – now up to model 4, which may be my next purchase.)

BTW, if you haven’t already guessed, the Nikon image is the one on the left. An old adage states, “The best camera to have is the one you have with you.” That may not always be the bigger, more expensive camera.

The caveat is that the Nikon can produce a large art photograph because the pixel size is 6012 by 4000. That is good for up to a 60″ print at my Fine Art America Gallery. The Olympus images are 4608×3456 pixels, good for up to a 48″ print.

The “fine print” so to speak…

A friend said if I didn’t do this in RAW I ain’t done. True, I ain’t quite done. However I tried to keep this as “real world” as I get. I stopped using RAW a good while back. Why? Everything in RAW has to be converted to JPEG in post processing and I found that the camera software engineers did as good a job as I would usually do – nearly every time (with a slight edge going to Olympus). Today I only save an image in RAW if is is majorly important and I may not have opportunity to re-shoot – but that is seldom the case. Keep in mind that both of these cameras are of a vintage going back over a half dozen years.

The sample image above was one of several comparisons I looked at and is representative of what I saw across the board. Nikon DX lens AFS Nikkor 55-300mm 1:4.5-5.6 G ED. Olumpus MFT lens M. Zuiko 40-150mm 1:4-5.6 R ED MSC.

Focal length for those samples was set to 100mm, using an aperture of f-8, shutter speed 1/160 and ISO set to 200. I chose that because I usually shoot Aperture-preferred and either wide open, fully stopped down or f~8. I also usually zoom to 100mm if I am in a tele frame of mind – or I’ll go quite wide in the 20mm range.

Your comment(s) will be appreciated…